

Today, we are going to see how you can create Facebook business account and page for your business. Now let’s say you’re running a business, and you want to promote it online. Then Facebook business page is one of the best ways to reach out to new customers.
So after following this article, you will be able to create Facebook business account and page for your business. Where you can promote your business products or services. This will help you to reach more people about the business products. Also, it will increase your website traffic manifold and help you reach your desired business goals.
Now if you don’t have a website for your business. You can easily create one by following this article that name how to create a website.
Create a Facebook business account
- Let’s go to www.facebook.com
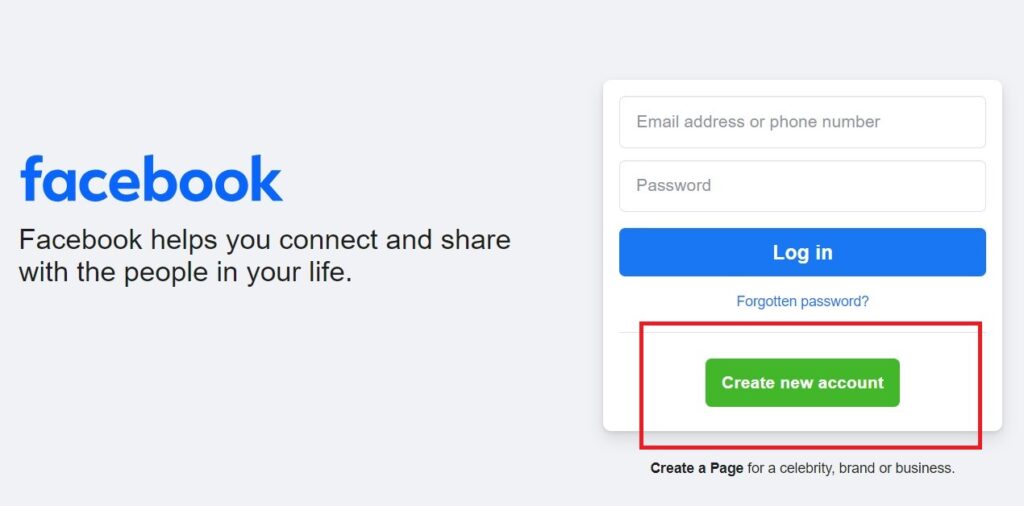
- Now, enter Email or phone number and create a strong password (with latter, number and special symbol).
- Then, click on “Create a account” button.
- After, you will be see the below image.
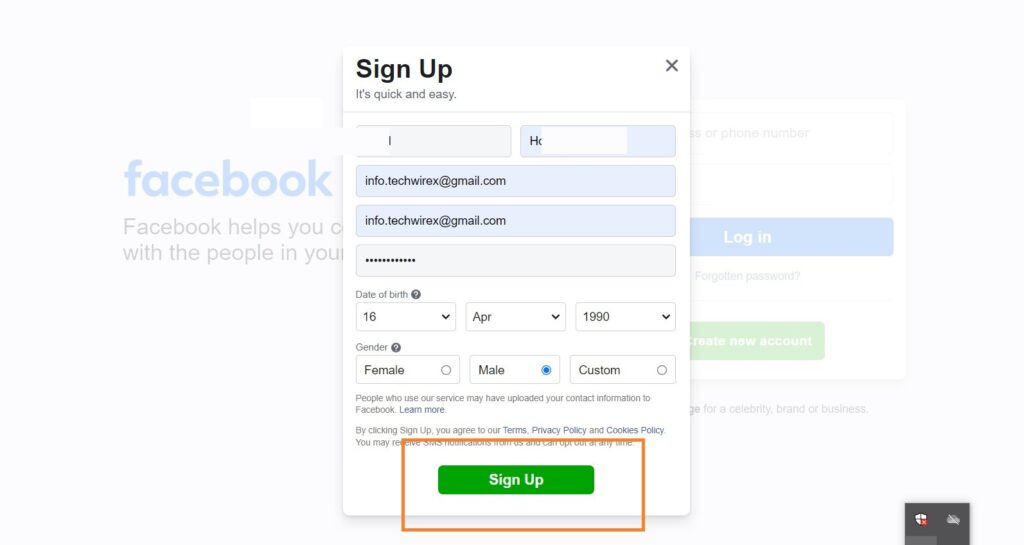
- Now, enter your date of birth and select your gender.
- Then, click on the “Sign up” button.
Facebook officially sent a verification code in email (if you use phone number, then it come on phone inbox SMS).
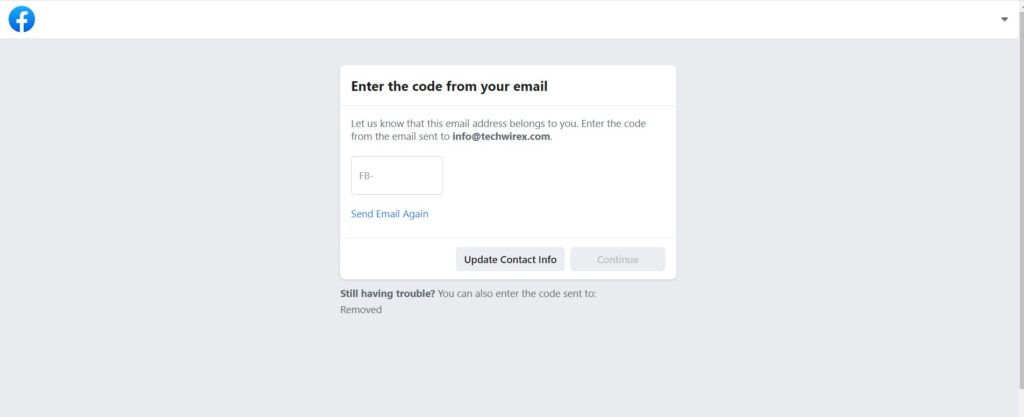
- Enter the verification code and click on the “Continue” button (follow the image above).
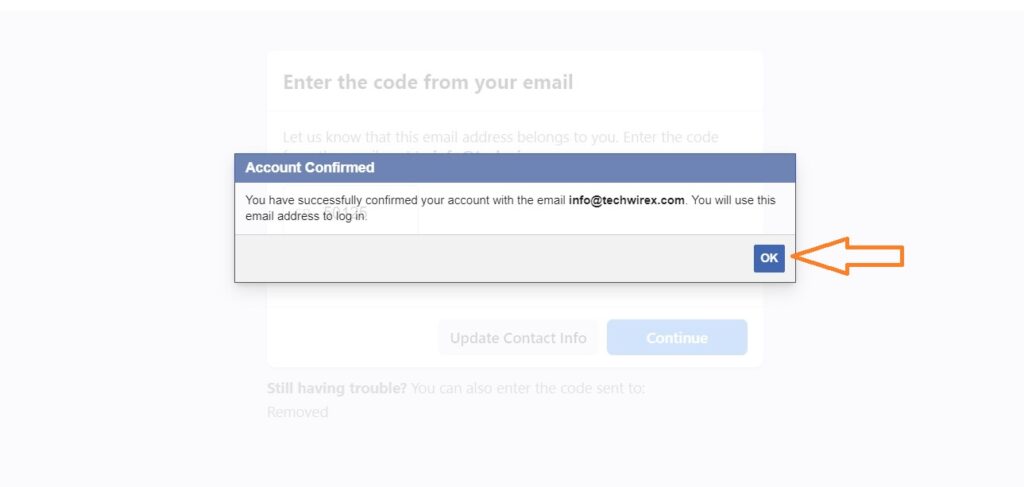
- Your account will be “Confirmed”, then click on “OK”. (See below image).
Welcome! Your facebook business account is created.
Now, you can add the profile picture, cover photo and change all information on the facebook business account.
Let’s get start to create Facebook business page:
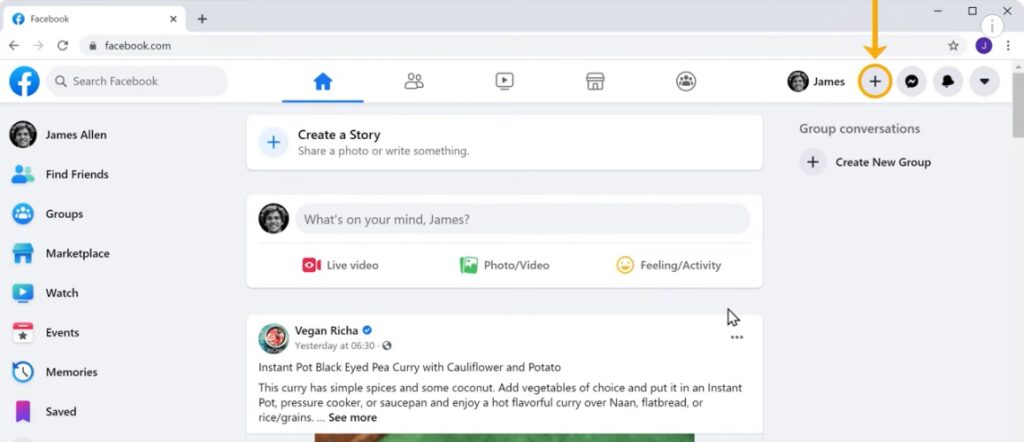
- Once you have logged in, now create your Facebook page.
- Click this “PLUS” (+) symbol, and then click on “Page” (follow image below).
It will take you to this page, as you can see, this will be the structure of your create facebook business page.
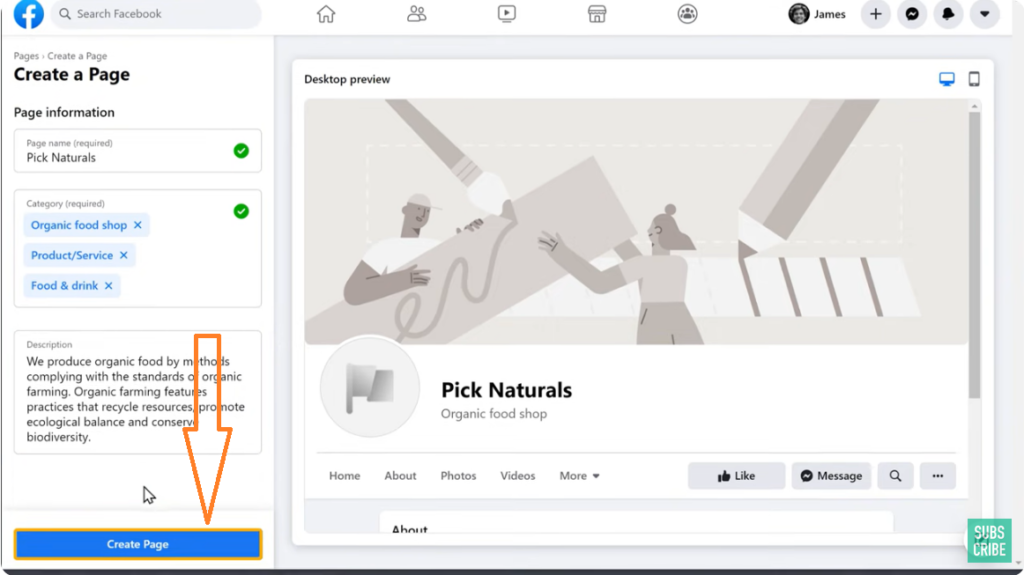
Now to create Facebook business page, just enter these details about your business
- First, you need to enter an unique name for your business company.
- Enter the category of your business in the required box, you can add up to 3 categories.
- Next, you need to give a description about your business in the last required box.
- Once you have added your business details, After click on the “Create Page” button. (follow image below).
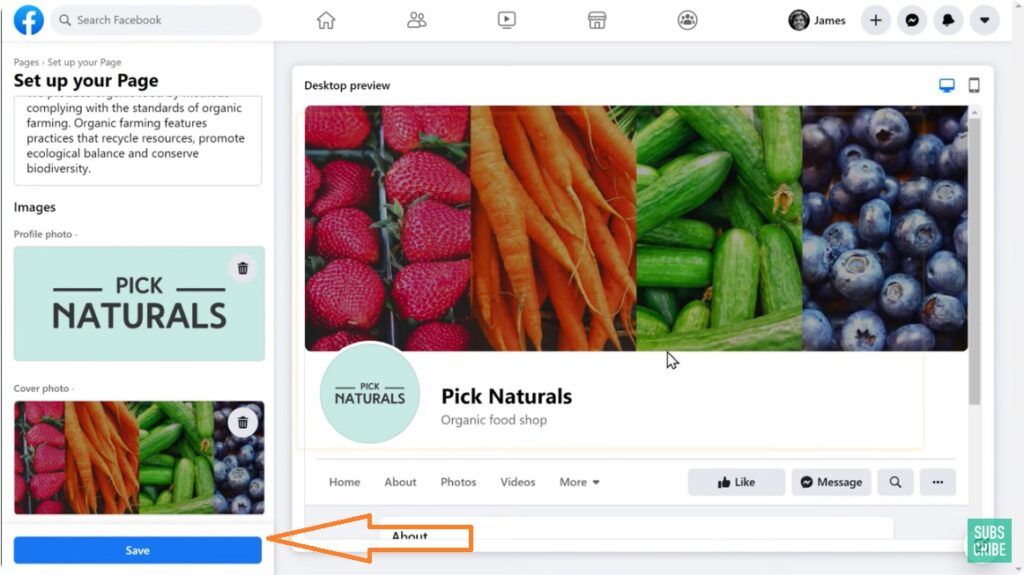
Your Facebook business page is created, once you’ve created the page. You can see that a new section has appeared here, where you can add the images to your page.
Let’s know how you can start adding more details about your business on the Facebook page:
- First, Let’s add a profile picture.
- So, just click “add profile picture”.
- Open a window now select your image and then click open
- As you can see, the profile picture has been added here.
- Next, let’s add a cover photo to your business page.
- Let’s click on “Add Cover Photo”
- Now select the image you want
- Then click open, now to save these changes.
- Click on the “SAVE” button.
Following image below:
Now let’s scroll down and as you can see about section
We can add a few more details about our business, so to add these details, click on “Edit Page info”.
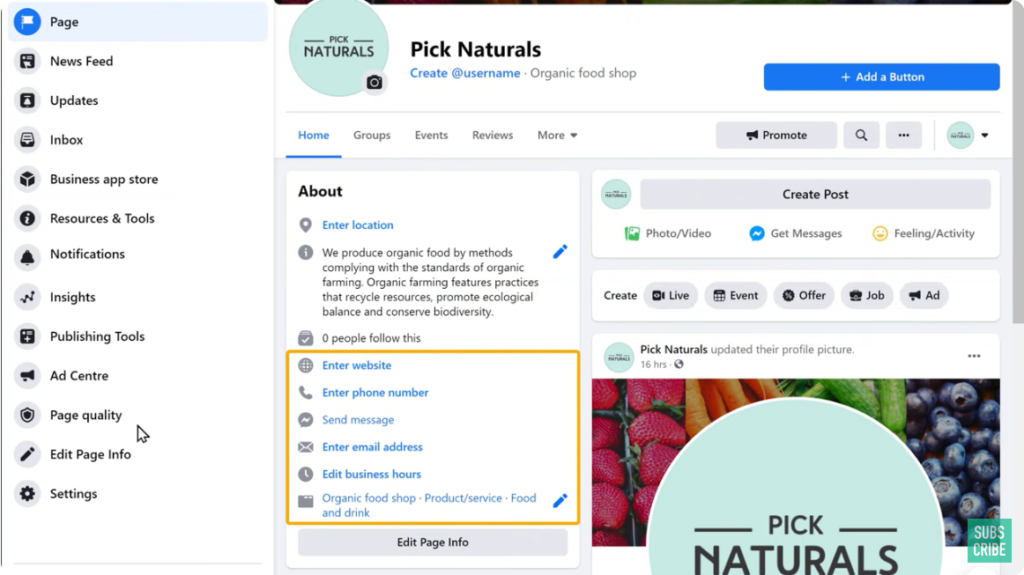
As we’ve already added these details, Next let’s go to contact. Now here you need to enter your contact details. Which your customers can use to contact you.
Let’s fill up these details
Now if you don’t want to enter your mobile number here, you can just click to select “My page doesn’t have a phone number”.
Enter your email address
After, you need to enter your website URL in the blank box. (If you don’t have a website, then select “My page doesn’t have a website”.
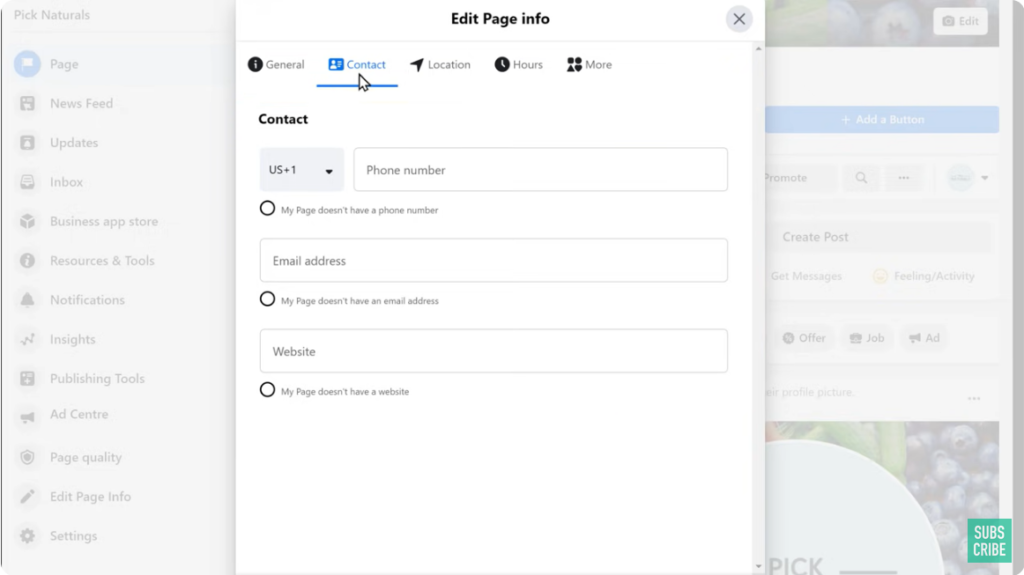
Once you have entered these details.
Next, let’s go to location
Now here, you can add the location of your business on your Facebook business account page.
If you have an online business like ecommerce and you do have a location for your business. You can just click here and now answer these questions based on your business.
- Here select the area where you’re providing your service.
- Once you have added your location, next go to hours
Now here you can display the working hours of your business on your facebook business account page. As my website is a fully ecommerce site, I’m going to leave it as it is. Here, you can also add the temporary changes to your working hours, if you have any.
- Now if you go here, we can add a few more details about your business.
- Let’s say you’re selling products, you can select the price range of your products here.
- So you’re going to select any based on your business or products.
Now if you have any other social media account, like Instagram, Whatsapp or Twitter. You can also add it to the business page.
Once you’re done adding your details, just click here and as you can see, all the details have been added to your page.
Next, let’s see how you can change the following button on your page
Let’s go back to our Facebook page and click “add a button”.
Now here you can find different types of buttons, which you can add to your facebook business page. Let’s say you want to add a shop now button, just select “Shop Now” and then enter the URL of the page.
Which you want to show, when the visitors click on the button to visit your website products page.
Next, let’s see how you can change the URL of your Face Page
So change the URL, just click here “Create@Username” below the page name.
- Now enter a name which you want in your URL.
- Once you have given the “name” click “create username” ( You might have less than 25 followers on your facebook page).
I hope following the above article to completely create facebook business account page for your business and products. If you have any questions about the tutorial then you can write a comment below.
I am provides technical reviews, Windows, Android apps, GSM Tools, software, screenshot tips and social media details and how-to guides. Also, concurrently, try to enhance your skills by solving various technical problems.